

How to Detect Hidden Wi-Fi using NetSpot
I am sure that if you are reading this article, you need to find all the wireless networks that are being broadcast in your area, including those that have hidden their SSID.
So first you must know that what is a hidden network.
Table of contents
What does the Hidden Network hide?
All WI-FI networks broadcast Service Set Identifier (SSID) every 100 milliseconds to let other gadgets know about their presence. Some routers don’t broadcast their SSID because they have enabled the hidden network option.
This option stops the broadcasting of the network’s SSID, which causes it to disappear and invisible to all the devices that connect to WIFI networks.
How to Scan for Hidden Networks
Hidden networks not broadcasting their names doesn’t mean that they are completely hidden. They communicate with other networks, so it is possible to detect using a Wi-Fi network scanner named as NetSpot.
NetSpot is a licensed application, a wireless network analyzer that can instantly collect all the information of all the Wi-Fi networks broadcast in your area. If you desire advanced features like advanced visual analysis, planning of wireless networks, you could go for their Pro Version. But if you just want to discover the networks in your area, the Free version is good enough for you.

So here is the step-by-step guide for you to detect hidden Wi-Fi SSIDS by using NetSpot.
Step 1. Download and Install NetSpot:
The first step is simple, you just must download NetSpot Free Edition from their website. After downloading just install it by following their instructions. The installation will be over in a couple of seconds. Then Launch the application and you are good to go.

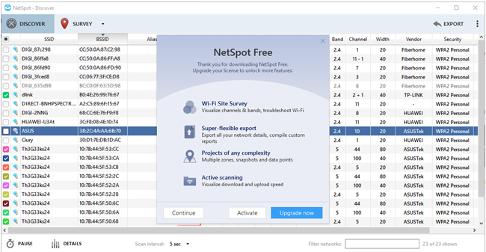
Step 2. Launching NetSpot: When you launch NetSpot, you will see a prompt that will ask you to upgrade to the Pro version. If you want to upgrade, just click on the Upgrade option else, just press Continue and you can use the app for free.
Step 3. Analyzing Networks:
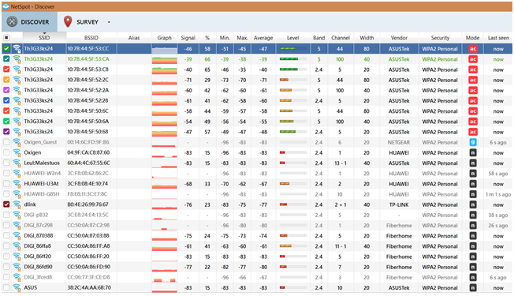
You must wait for a couple of seconds until it analyzes the wireless networks in your area and displays you all the Wi-Fi networks that it finds. For each Wi-Fi network, you will see the following details:
- Its BSSID or network name.
- A graph with the signal strength history.
- The security or type of encryption used.
- The alias of the network.
- The vendor of the device emitting wireless signal.
- The signal emits on the wireless band, utilizes the channel, and has a frequency channel width of 20, 40, or 80 MHz.
Step 4. Comparing Wi-Fi Networks:
Scroll down the list of Wi-Fi SSIDs and see what NetSpot has discovered. Write down those that interest you. Then, on your Windows laptop or mobile phone click or tap the Wi-Fi icon in the system tray area of the taskbar. You see a list with all the wireless networks that are not hidden.
The owners hide the SSIDs that show up only in NetSpot, after comparing the list of SSIDs in NetSpot with those displayed by Windows. In my area, Netspot has detected a total of 20 SSIDs or network names. By comparison, Windows 10 detected only 8 wireless networks. Twelve wireless networks in our area are hidden.
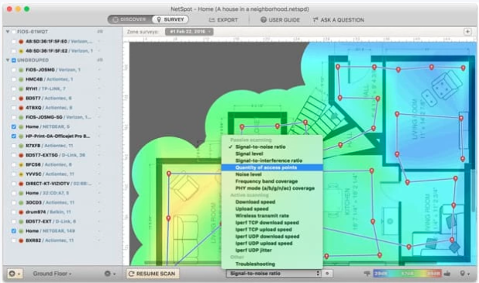
Using NetSpot to Survey a Known Hidden Wi-Fi Network
You can also use NetSpot to survey a known hidden Wi-Fi network, which can prove useful when you’re setting up a home wireless network you want to keep hidden from your neighbors.
To survey a hidden Wi-Fi network with NetSpot:
- Connect to the hidden network.
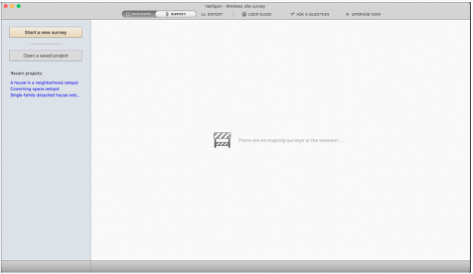
- Open NetSpot and enter the Survey mode.
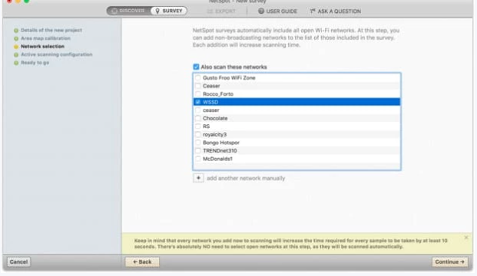
3. Add the hidden network.
4. Click Continue to proceed survey.
5. Analyse your survey results.
How many Hidden Wi-Fi networks did you find in your area?
If you have read my whole article about how can we detect hidden Wi-Fi using netspot, now it’s your job to use NetSpot to search for the hidden networks available in your area. Just share your experience with us, we are curious to know your side of the story.
You may also like

NFC Payments Safe? Tap-and-Pay Transactions

Facebook Account Hacking – Top 5 methods
